Your Friendly Guide to Steps to Build a Custom Home
Your Friendly Guide to Steps to Build a Custom Home
Building a custom home is an exciting journey. If you’re wondering about the steps to build a custom home in Northern California, this friendly guide breaks down each phase from finding land to moving in. You’ll learn what really takes to bring your vision to life, from budgeting and permits to framing and finishes.
Find the perfect lot
One of the first essential steps to build a custom home is to find and purchase the ideal plot of land that meets local zoning ordinances and has access to utilities like water, sewer, and electricity (HomeLight). To choose the right parcel:
Evaluate buildability: check zoning laws, setbacks, easements, flood zones, soil quality, and access to roads and utilities (MyBuilderCares).
Consult a builder early: a professional can spot hidden costs like utility connection fees or soil improvements.
Balance lifestyle and budget: think about commute times, school districts, and resale value.
Pick your home style
Next, decide whether you want a spec home, tract home, or a fully custom home. Each has its trade-offs:
Spec home: builder chooses most features, faster timeline, lower cost but less personalization.
Tract home: limited design options in a new subdivision, moderate budget, predictable process.
Fully custom: you select every detail, maximum creativity, higher budget and longer schedule (HomeLight).
Build your dream team
A strong team keeps your project on track. Key players include:
General contractor or custom home builder: oversees the entire build.
Architect or designer: creates blueprints and works with you on finishes.
Subcontractors (about 22 on average): framers, plumbers, electricians, roofers, and more (HomeLight).
Work with reputable northern california custom home builders who understand local codes and climate. Good communication and clear contracts help prevent surprises.
Get your building permits
Before breaking ground, secure all required municipal permits to avoid fines or work stoppages. To navigate the process:
Research local requirements: search online for “get a building permit in [your city and state]” and review your permit office’s FAQs (Mighty Small Homes).
Gather documents: site plans, blueprints, soil reports, and HOA approvals if needed.
Schedule reviews and inspections: building, electrical, plumbing, mechanical, and sometimes environmental or fire safety.
Plan budget and design
With land and permits in hand, refine your budget and finalize plans. To stay on track:
Create a detailed budget: list costs for land, permits, site prep, framing, systems, finishes, landscaping, and contingencies (Ramsey Solutions
Involve your builder early: sync design choices with budget through updated estimates to avoid cost overruns (Sims Builders).
Finalize blueprints: collaborate on layouts, window placement, room flow, and structural details.
Dive deeper into custom home planning tips and our custom home design build process to master this phase.
Prepare site and foundation
Now your contractor will ready the lot and lay a solid base:
Clear and grade land: remove trees, brush, and level the ground.
Install footings and foundation: pour concrete footings, build forms, and set the foundation walls or slab (HomeLight).
Proper site prep ensures a stable build, especially in Northern California’s diverse terrain and soil conditions. Learn more about custom home construction northern california.
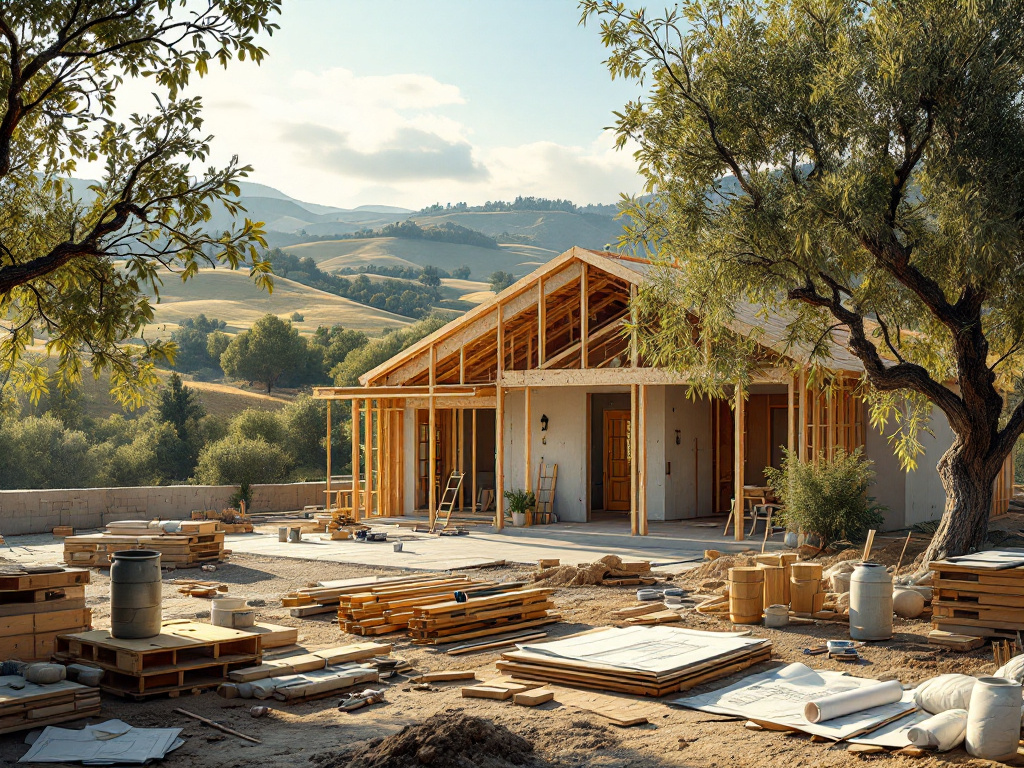
Frame and enclose structure
Framing gives your home its shape:
Erect walls and roof trusses.
Sheath the exterior with plywood or OSB.
Install windows and exterior doors to “dry in” the shell.
At this point you’ll really see your home take form.
Install systems and roof
With the shell sealed, licensed crews will:
Rough-in HVAC ductwork, plumbing lines, and electrical wiring.
Insulate walls and ceilings.
Complete roofing with shingles, metal panels, or tiles (HomeLight).
Regular inspections ensure each system meets code before moving to finishes.
Finish interior and exterior
Time for style and details:
Hang drywall, tape, and sand.
Paint walls and ceilings.
Install cabinets, countertops, flooring, trim, and light fixtures.
Complete siding, driveways, landscaping, and outdoor features.
Early material selection and ordering can prevent delays at this stage (Sims Builders).
Finalize and move in
As your build wraps up:
Conduct final walkthroughs to address any punch-list items.
Pass last inspections and request occupancy certificates.
Secure homeowner’s insurance and title protection for peace of mind (Mighty Small Homes).
Get your keys and celebrate moving into your custom home.
Key takeaways
Find land that meets zoning, utilities, and lifestyle needs.
Choose between spec, tract, or fully custom to balance cost and design.
Assemble a trusted team: builder, architect, and about 22 subcontractors.
Secure all necessary permits before breaking ground.
Plan your budget and blueprints in lockstep to avoid surprises.
Prepare the site, frame the structure, install systems, then finish details.
Complete inspections, secure insurance, and enjoy your new home.
Ready to start your custom home journey? Reach out to our expert northern California custom home builders at Olive City Construction and let’s bring your dream home to life.
